Monday, March 17, 2014

MOM: Living Life Without Fear and Anxiety


Today, my boys are 6 and 8. I feel like the last year has been quite a journey for me. My sons are old enough now to take care of many things themselves and I've now started to have a little time of my own to be creative. To make something or do something for myself.  It really has been life changing for me. I feel like I'm breaking the chains of no self worth... or being comfortable and not taking risks... fear...

And one of the reasons for this change in myself? Controlling my anxiety. I've always been an anxious person - and now I've realized I've had anxiety since I was a young girl. I remember crying uncontrollably as I was positive I was going to catch meningitis from my teacher who probably caught it from her son who probably caught it while playing hockey with the boy that died from it.Yeah, that didn't happen. There are many other things that I realized were huge signs of anxiety that I didn't realize until now - in my late 20's. So when I started taking medicine that calmed me down, life was brighter. Life was sweeter. Life was much more amazing. I didn't fear that my children were going to die constantly (still a fear, but it doesn't overcome me). I didn't put my husband in the grave when I saw a weird mole in his back (I literally was planning his funeral for nothing).


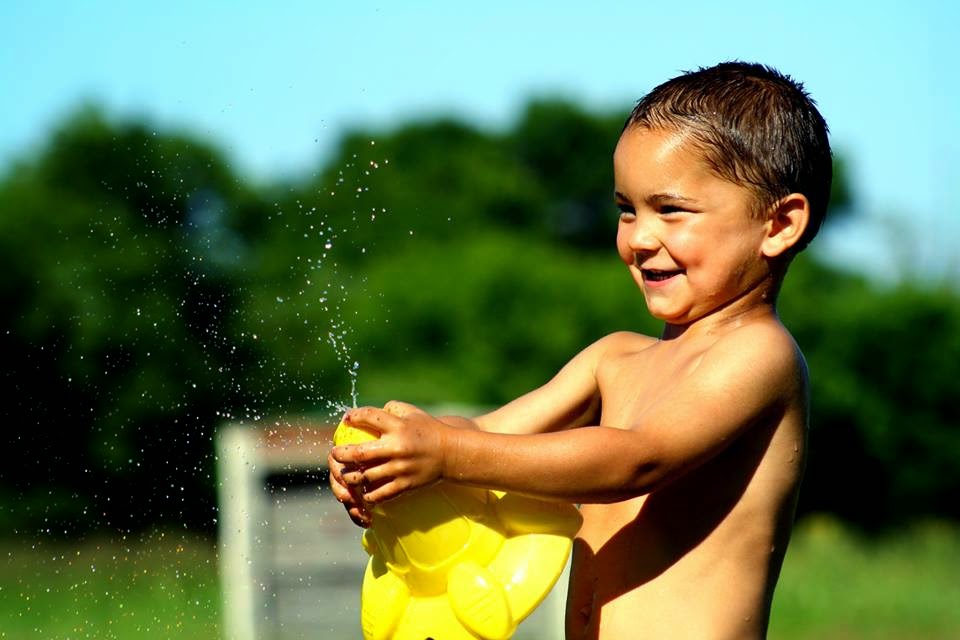
I look at my children NOT with fear. I now look at them with hope and anticipation. Who will they be? What quirks will stay with them as they get older? Why am I so blessed to be their mother and raise them into the men they will soon be?


When you look at your children, what do you feel?

This blog will be taking a little U-turn. It will be a very mixed blog pretty soon. A mixed blog just like my life - crafting, sewing, re-selling on eBay, selling on Etsy, garage saling, thrift store shopping, trying to start an online business, raising 2 very active boys and living with a husband that is sometimes a little hard to live with.

Tuesday, May 17, 2011

Sewing Desk Makeover/Re-Do! Try #2...

About 2 months ago when I bought my Pfaff, I inherited an old sewing desk that came with it.
At first I had no idea what to do with it. This was before my hours of blog browsing! Then I realized what I could try to do with the sewing desk, and the fun started!

Here is the desk before:
                          

Then I painted it off-white.
I also had this type of glaze that I tried.
In the end, it turned out like this:


It was okay, but I wasn't crazy over it. It just didn't look like the right distressed glazed look like the other super-creative girls out there did.
But I wasn't using the right glaze anyways!
So when my 3 year old took a sharpie marker to the top... I didn't get that mad.
It made me try something else...


Distressed blue. I actually mixed a darker blue with a green. Mistints from the Benjamin Moore shop in town, of course! Freeeeeeeeeee!


Something was verrrry interesting.


This is a candle mat and candle I've made for one of my son's teachers for the end of school.
I should actually be making another one right now so I need to stop blogging.


And to finish it off.

And there is my robin egg blue sewing desk!
Should I keep it this way? Or try something else?
Thanks for looking!

Linking here:

Monday, May 16, 2011

A Few Garage Sale Finds this Weekend

This past weekend in MN was fishing opener! Yay!
It also means that everyone and their dogs were out garage sailing OR having a garage sale.
In the past, I've found you don't find lots of goodies due to your large competition, but you can find some.
Here are a few of mine...
This grey corduroy chair was a little odd - but SO comfy! It folds up real nice too. It was $5. I debated. Waste of space, or worth it? I decided I didn't have a good chair in the boys' room so it was coming home. This is the ultimate read-and-watch-the-sunset chair. So cozy. And I have a love of curduroy.
Do you see my butt imprints?

 These BabyGap shoes were $3. A little more than I'd spend on a pair of shoes for the boys. So I went to go find them to take a picture... And here they were. One minute - nice and clean. Next minute - full of dirt. Story of my life.
Disney Sully costume!! $1?!?! I'll take it!
 And this is why I'll take it!
 Bad picture. But huge grapevine wreath for the house. $1? I'll take it again!
Bike w/ training wheels for my 3 year old? Just needs new tire. $2? Take it a third time! I've been searching for one!
And this beauty... I can't believe I even looked at this and debated. It was $5. Beautiful porch swing. Aged and everything. I just couldn't figure out where we'd put it. I, unfortunately, don't have a beautiful wrap around porch yet like I dream about each night. But my husband helped me make it work and hang on the deck. We didn't have a place to sit before - and now we do!
When I bought this, an older lady said to me that her grandkids used to call it grandma's swing because that is where she would sit with them and read them books in the summer. Now that's cool. :)

Unless you are a fisherwoman, you may not get this. I was pumped. First - I asked the lady how much the tackle box was. She said $2. I said sold. It had all sorts of great stuff in it! New lures, lots of bobbers, weights, line, leaders, etc! Then I found this pair of antlers - it was an 8 pointer and there was still some hair attached. I know. Gross. But $3? You can make antler lamps and all sorts of cool outdoorsy things with those! Totally worth $3. The hubby was like - WHERE did you get these?!
 This I also debated on. It was a full big cardboard box of scraps. Old sewing fabric. For $1. I couldn't decide if I was bringing home junk or if I could use it. I bit the bullet and bought it. And it was super fun to go through when I got home - so that alone was worth $1.
The picture is after I cleaned it out some. Lots of spools of thread, knitting needles, crochet hooks, tons of 2" pre-cut fabric squares that were going to be used for a quilt... But it never happened.
What sold me was the doll fabric.... So cute and vintage!
 Above are a few of my favorites.
 Love. But what will I use it for?
 Here is another close up of the paper doll fabric. But what will I use THIS for?!
 A cute little iron plant hanger. Always wanted one. $2.
Could use another liner thing but that shouldn't cost too much.
 I don't normally like stuff like this - and $3 was a little steep normally for el-cheapo me... But I really liked it. It hangs by my patio door where nothing was and I love the bright green and yellow. It's enough color to see it when you drive up to the house.
And, finally, this little rooster. $1. My husband laughed at this. I think it goes darling in my kitchen. The red head matches the wall. The green body matches this frame I have. (Pictured behind.)

 
Of course I got other fun things. But if I listed everything I got... I'd have many very long posts. ;)

Thursday, May 12, 2011

Patchwork Sewing Machine Cover

Unfortunately, this isn't much of a tutorial. I kinda flew by the seat of my pants on this one.

I'll back up. I learned to sew about... 2 months ago. 
On a 1975 Kenmore like this:
 She was actually a pretty sweet little thing to learn on.

Then I decided to bid on a Pfaff hobby machine at an estate auction and won it! It's nothing crazy expensive - just a good, solid machine for learning on. $91 total. So exciting!
I love her - and I named her "Pfaffy". Here is what she looks like:

I saw all these darling little sewing covers and had to try one for one of my first projects. So just by looking at different pictures, I decided to just start making some patchwork strips and then adding strips in between - and just see how it ended up when I was done!

And here she is! Don't you love my craft room - errr - kitchen table? 
Try it crafty girls!

Thanks for reading bloggers! It means a lot!

Linking to:

Wednesday, May 11, 2011

Barn Stars out of Oven Roaster pans! El-cheapo!!

So I stumbled upon this blog idea by a very smart lady at Choose to Thrive.
She's genius.
I, along with everyone else it seems, love those barn stars. They give me a warm, country feel. But when I'd walk up to them and glance at those price tags - I'd shudder. I'm too cheap to spend that kind of money! So I went to my local overstock warehouse type store and bought some oven roasters for 69 cents each. (Did I mention this was el-cheapo??)

Her tutorial is great!
And here are my results...


I had a very boring space above this railing in our house. I had no idea what to do up there and didn't really want to fill it up with dust collectors. I like them - for now!


I actually painted them the with the wall color paint I used for the wall below. I think it matched pretty well!
This red paint liked to kind of fleck off a little easier.
But that was okay with me, because it gave it a more vintage feel.


Thanks for reading! Head over to her blog!

Tuesday, May 10, 2011

Jewelry Armoire Re-Do & Paint (Craigslist find!)

Well, one more project completed. This is pretty much my first furniture re-do!

I was browsing the Craigslist free ads one day and saw a "FREE JEWELRY BOX" ad in MY town for once! I texted right away and it was mine. 

I pulled up after work in my little Volvo car and SOMEHOW, by an act of God, got that sucker wedged in the passenger side. Let's just say my 3 year old had to sit with one of his legs folded under him in the back seat. What a trooper. (I want a truck!)

Before:


The lady had called it a jewelry box. But the correct term is a 4 foot tall jewelry armoire. The doors looked like they'd been stained... And there was hardware that had been attempted to be put on the doors and on the inside. She had said she "just wanted it out" and didn't finish it. A project that had been sitting there for a while. Do you see that gross red stain gooey crap on the inside?

So I painted it an off-white. I didn't use primer. I now know the importance of primer.
I then decided to leave those top doors off. I finished by painting stripes on the back of it - the color is a tan/green but is more of a green. I love it. It's on my bedroom walls so it matches nicely. :)

After:


Light distressing, of course.


All in all, I'm proud. It works well in my room. And I needed a place to hang my necklaces!
Tangled necklaces are the worst when trying to get out of the house on time!

Thanks for reading!
Alicia


Linking to:


Furniture Feature Fridays


Thursday, April 14, 2011

Distressed "Barn Style" Last Name Greeting Sign from Old Wood!


I had been awing and ooing over all these distressed signs made from old barn (or other) wood that people were making on different blogs. Pair that with the fact that I LOVE signs that have your last name on them, and I decided I was going to make my own sign!

Again, I dug in my pile of old wood and junk. I found a plank of wood that looked like it may have been an old piece of siding? It was beautiful! Still damp from the swamp water... But still had some fading seafoam green paint, cracks on the bottom, wear on the top and bottom - I loved it! So I brought it up to the house and let it dry in the sun and wind for a couple days until I could tell it had really dried through. 
I was impatient, like normal.

So I went on to this site where you can download lots of free, new fonts. You could even put your word (so I put my last name) on this preview and it showed you each font and what it would look like in the font you've chosen. This is so helpful because it is very hard to see what it would really look like bigger. Don't you agree? Anyways, the site is called DaFont. Check that out sometime for a project like this!

Unfortunately, I don't have pictures of it before or during my process because I'm still getting used to this! I printed off a few pages of my lonnng last name. I just guessed on the right size. And I guess right, for once! I used an exacto knife and my cutting mat to cut out the letters on the paper to make it a stencil. Then tape it on tight to the sign exactly where you want it. It doesn't lay totally flat - but I tried my best. The font I happened to choose was more timber/rustic so if it got screwed up it would (hopefully) just add to the character. I took my el-cheapo white spray paint and tried it. It did nothing. So then I got out my cheap Folk Art white paint (just plain 'ole acrylic) and small paintbrush and went to work. 

Super fun painting. I let it dry and then did another coat. I carefully peeled off the stencil and there were a few places that had bled over with white paint but I just took my exacto knife again and scraped it away off the old wood. Then I took some clear protective spray I got at Ben Franklin. Man, I can't remember the name! But I sprayed it on the front of the sign for a few good coats. To hopefully prevent running of the paint.

Then I decided to go au-natural and nail it up on a tree that is right before the opening to our home. Very rustic. Very us. SO easy! I love my sign. I really do. Try it out!! I'm secretly hoping one of my family members or friends ask me to do one for them. 


Love the old wood...